
Riparazione strisce LED: come risolvere il problema della retroilluminazione difettosa su televisori Telefunken, Sony, Samsung e LG
Trovato il: 03-08-2023
Riparazione strisce LED: come risolvere il problema della retroilluminazione difettosa su televisori Telefunken, Sony, Samsung e LG - Il video mostra come riparare le strisce LED di diverse marche di televisori, come Telefunken, Sony, Samsung e LG. Il problema affrontato è la retroilluminazione difettosa, che può essere causata da uno o più LED bruciati. Nel video viene mostrato come testare il funzionamento delle strisce LED utilizzando un alimentatore stabilizzato. Inizialmente vengono collegati i puntali dell'alimentatore alle strisce LED per individuare eventuali LED difettosi. Successivamente, viene sostituito il LED difettoso con uno nuovo, saldando i due capi dell'alimentazione. Infine, viene effettuata una prova per verificare il corretto funzionamento delle strisce LED riparate. Il video si conclude con l'invito agli spettatori a mettere un pollice in su e iscriversi al canale se hanno apprezzato il video.
Dal canale Youtube DjGalaxy88.
Vediamo passo dopo passo...
1. Riparare le bacchette LED difettose di una TV con problemi di retroilluminazione
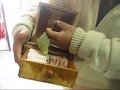
In questo video, il protagonista mostra come riparare le bacchette LED di una TV che presentano dei problemi nella retroilluminazione. Dopo aver individuato le bacchette con i LED bruciati, il protagonista le collega a un alimentatore stabilizzato per testarne il funzionamento. Le prime due bacchette si accendono correttamente, mentre la terza non si accende affatto. Utilizzando un tester, il protagonista individua il LED difettoso e lo sostituisce con uno nuovo. Successivamente, salda i due capi dell'alimentazione rispettando la serie dei LED e prova nuovamente le bacchette. Questa volta, tutte si accendono correttamente. Alla fine del video, il protagonista invita gli spettatori a mettere un pollice in su e a iscriversi al suo canale se il video è stato di loro gradimento.
2. Fixing LED strips with backlighting issues on a TV
In this video, the protagonist shows how to fix the LED strips of a TV that have backlighting issues. After identifying the strips with burnt-out LEDs, the protagonist connects them to a stabilized power supply to test their functionality. The first two strips light up correctly, while the third one doesn't light up at all. Using a tester, the protagonist identifies the defective LED and replaces it with a new one. Afterwards, they solder the two ends of the power supply, respecting the LED series, and test the strips again. This time, all of them light up correctly. At the end of the video, the protagonist encourages viewers to give a thumbs up and subscribe to their channel if they enjoyed the video.
3. Riparazione delle strisce LED con problemi di retroilluminazione su una TV
In questo video, viene mostrato come riparare le strisce LED di una TV che presentano problemi di retroilluminazione. Dopo aver individuato le strisce con i LED bruciati, vengono collegate a un alimentatore stabilizzato per testarne il funzionamento. Le prime due strisce si accendono correttamente, mentre la terza non si accende affatto. Utilizzando un tester, viene individuato il LED difettoso e sostituito con uno nuovo. Successivamente, vengono saldati i due capi dell'alimentazione rispettando l'ordine dei LED e le strisce vengono testate nuovamente. Questa volta, tutte si accendono correttamente. Alla fine del video, viene chiesto agli spettatori di mettere un pollice in su e iscriversi al canale se il video è stato apprezzato.
4. How to fix LED strips with backlighting problems on a TV
In this video, the protagonist demonstrates how to fix the LED strips of a TV that are experiencing backlighting issues. After identifying the strips with burnt-out LEDs, they connect them to a stabilized power supply to test their functionality. The first two strips light up perfectly, while the third one doesn't light up at all. Using a tester, the defective LED is identified and replaced with a new one. Afterwards, the two ends of the power supply are soldered, respecting the LED series, and the strips are tested again. This time, all of them light up correctly. At the end of the video, viewers are encouraged to give a thumbs up and subscribe to the channel if they enjoyed the video.
Informazioni generate automaticamente sulla base di fonti esterne da sistemi di AI e che potrebbero in alcuni casi risultare inacccurate o errate (vedi le fonti)
Altri video correlati

LG - Il video di GiovaTech riguarda l'aggiornamento delle applicazioni su una Smart TV LG.
Sony KV-29C5A - Il video riguarda la riparazione di un televisore Sony modello KV-29C5A.
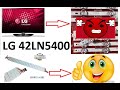
LG 42LN5400 - Il video mostra una modifica effettuata su un televisore LG 42LN5400 per migliorare la retroilluminazione.

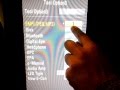
LG Flatron - Il video tutorial mostra come organizzare una lista personalizzata di canali su un televisore LG Flatron.
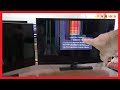
Samsung 32 pollici () - Il video di Luigi Di Donato riguarda la riparazione di un televisore Samsung da 32 pollici con un problema di retroilluminazione.
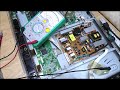
Samsung 28 pollici - Il video mostra un tentativo di riparazione di una TV Samsung da 28 pollici che presenta un problema alla scheda di alimentazione.

Samsung LE32A456 - Il video mostra la riparazione di una TV Samsung LE32A456 esplosa.
Samsung - Il video mostra la riparazione di un televisore Samsung SyncMaster T200HD che non si accende.
LG 32LJ510U LED - Il video mostra la riparazione di una TV LG 32LJ510U LED colpita da un fulmine e con l'immagine ribaltata.
LG LH/LF - Il video mostra come sbloccare la porta USB sui televisori LG serie LH/LF.
Samsung LE26A456 - Il video mostra la riparazione di un televisore Samsung LE26A456 che non dava segni di vita ma aveva la retroilluminazione presente.

Samsung Smart TV - Il video mostra come attivare l'applicazione Now TV su una smart TV Samsung.
Samsung Smart TV con sistema operativo Tizen - Il video tutorial di GiovaTech mostra come sintonizzare i canali del digitale terrestre sulle Smart TV Samsung con sistema operativo Tizen.
Samsung - Il video mostra come aggiornare la TV Samsung utilizzando due metodi differenti.
Samsung - Il video spiega come sintonizzare una TV Samsung.
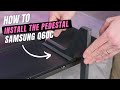
Samsung Q60C - Il video mostra come installare il piedistallo della serie Samsung Q60C per il 2023.
Samsung UE49RU8000U - Il video mostra l'unboxing e l'installazione di una TV Samsung 4K UE49RU8000U da 49 pollici, uscita nel 2019.
Samsung Smart TV - Il video mostra come installare nuove applicazioni sulla smart TV Samsung.
Samsung Smart TV - Il video mostra come registrare programmi sulla Smart TV Samsung utilizzando una scheda MicroSD, una chiavetta USB o una scheda SD.
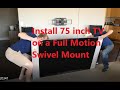
Sony Bravia - Il video mostra come installare un supporto da parete per un televisore Sony Bravia 4K UHD da 75 pollici.